
Storing pine boards between buying and building
Protect and support timber between delivery and preparation, with the material information kept alongside it.
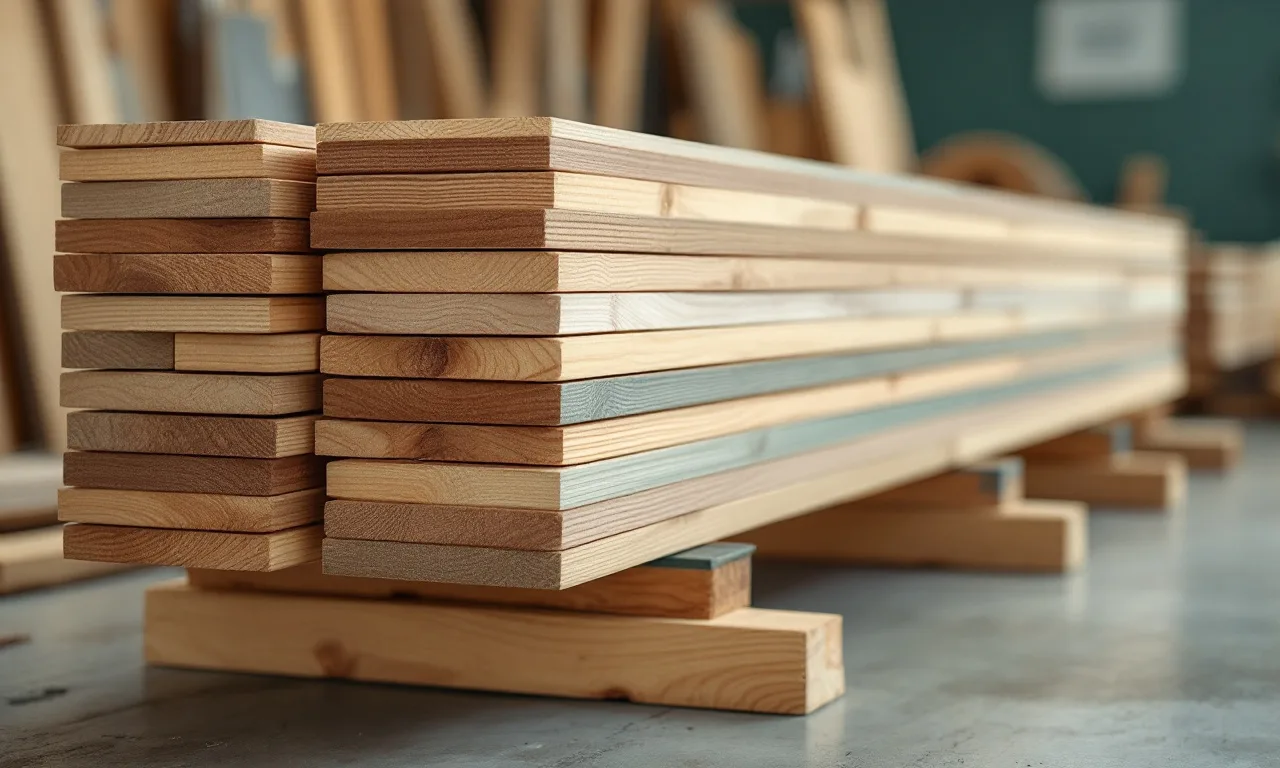
The boards have arrived, but the project is not ready for them. This ordinary gap between buying and building is where careful material selection can be undone. A damp floor, uneven support or a forgotten leak can change the stock before the first useful cut. Storage deserves a place in the plan before the delivery is booked.
A home workshop does not need to resemble a commercial drying facility to keep material organized and protected. It does need a suitable location, support that matches the stock and a way to identify what has been bought. This guide covers short-term workshop planning, not kiln operation, structural rack design or a universal drying schedule.
Prepare the location first
Choose a place where the timber can stay protected from weather, leaks and avoidable contamination. Check the route from the delivery point to that location. Long boards need turning space as well as floor area, and a narrow doorway can complicate handling more than the final stack suggests.
Keep stock away from direct contact with a damp floor or wall. Consider what happens during ordinary use of the room: doors opening, vehicles moving, cleaning water or other materials being stored nearby. A spot that is dry on delivery day may not be reliably dry throughout the project.
Avoid placing timber where it blocks access, exits, electrical equipment or safe movement around tools. Storage should not force a person to reach through machinery or move an unstable pile every time a common item is needed.
Support the boards deliberately
A board resting on a few badly placed points can be encouraged into an unwanted shape. Support should be stable, aligned and appropriate to the length and weight of the stock. For a horizontal stack, think about the support beneath the whole stack as well as the spacers between layers.
Where stickers or spacers are used, keep their placement consistent through the stack so loads are transferred sensibly. Choose suitable clean material and avoid introducing uneven lumps, dirt or metal that can mark the wood. The appropriate spacing depends on the stock and purpose; do not copy a number without considering the actual boards.
Do not build a heavily loaded rack from an improvised fastening detail. The rack, wall or floor support needs to be suitable for the weight and arrangement. Obtain qualified guidance for a consequential installation rather than treating a photograph as a structural plan.
Allow the environment to reach the material
Wood exchanges moisture with its surroundings. Stacking and exposure influence that exchange. A tightly packed pile, a board lying against a different surface and an evenly spaced stack can present different conditions to the wood.
The aim of storage should be clear. Are you protecting already suitable stock before work, allowing it to adjust to a new environment or managing a drying process? Those are different tasks. This article does not provide a drying schedule for green timber or a guarantee that a certain number of days makes thick stock ready.
For furniture planning, consider how the storage environment compares with the final room. The wood-movement guide explains why that comparison matters. A calendar alone cannot establish that every board has reached the condition required for the project.
Keep the stack identifiable
Retain the supplier's description, tally and labels. Record species or commercial group, nominal and actual dimensions where known, purchase date and any moisture specification. Keep treatment or history information with the stock if it affects the intended use.
Assign board identifiers if the project layout depends on particular pieces. Mark the planned visible face and part allocation in a way that will not damage the finished surface. A small tag or light pencil mark in a waste area may be more useful than writing across the best face.
Keep new stock separate from unidentified leftovers until their uses are clear. A board that looks similar can have a different treatment, moisture condition or history. Appearance alone is not a reliable inventory system.
Check condition without overinterpreting
Inspect the stack periodically for leaks, support problems, surface changes or unexpected distortion. A check after a major change in room conditions can be useful. Record a problem while the original arrangement is still visible, then address the cause rather than merely moving the affected board to the bottom.
If you use a moisture meter, keep the settings and measuring locations consistent enough to compare readings. Check several locations and pieces as appropriate. One reading on one convenient end should not stand in for the condition of the entire stack.
The meter buying guide explains measurement limits. A changing reading may reflect the wood, the environment or a changed measuring method. Investigate differences before turning them into a confident story about how fast the timber is drying.
Protect useful surfaces
Keep abrasive grit, glue, oil and finishing products away from the stored stock. A small contamination mark can become a conspicuous problem under a clear finish. Do not use the best board as a temporary shelf for open containers simply because it is conveniently flat.
Protect edges and ends from repeated knocks during other workshop tasks. If boards must be moved frequently, reconsider the location or the order of the stack. Repeatedly lifting the whole pile to reach one piece creates more handling risk and more opportunities for damage.
Avoid wrapping material in a way that traps unwanted moisture without understanding the storage conditions. Packaging that protects during one stage of transport is not automatically the correct long-term arrangement in a different environment. Follow supplier guidance where provided and ask when the purpose of a wrap or barrier is unclear.
Store for the sequence of the project
Put the parts or boards needed first where they can be reached without destabilizing the rest. Keep the layout plan nearby so the best long clear section is not casually cut into short blocks. A stack is more useful when it supports the next operation.
When rough parts have been cut, maintain their identity and support. Smaller blanks can still change shape or become mixed up. Keep matched parts together and distinguish rough dimensions from finished ones on the working list.
The cut-list guide provides a simple stage system. Storage and the cut list should agree: a part marked prepared should not be indistinguishable from an unprepared blank at the back of the bench.
Handle long stock with a plan
Know the weight, length and route before moving a board. Use appropriate help and handling equipment for the situation. Long stock can swing into people, lights or machinery even when it is not especially heavy.
Clear the destination and the route first. Do not rely on finding a temporary resting place halfway through a carry. Where the stock has sharp edges, splinters or an identified treatment, follow suitable handling precautions and the relevant product information.
If a delivery requires unloading beyond your available means, arrange that service before it arrives. The timber order checklist includes unloading and access because these are part of a workable purchase, not minor details to improvise at the curb.
Separate offcuts from project stock
An offcut can be valuable, but a mixed pile makes both current material and future leftovers harder to use. Keep the current project's allocated pieces clearly separate. Store useful offcuts by a simple system that allows their dimensions and identity to be seen.
Set practical limits based on space and likely use. A narrow strip kept indefinitely can cost more in handling and clutter than it saves. Do not retain unknown treated or contaminated material for casual indoor projects merely because it looks like usable pine.
For finish samples, keep representative clean offcuts from the actual stock and label them. That is a deliberate use, unlike keeping every piece without a plan. The finish-sample guide explains what information makes those small pieces worth saving.
Before final preparation
Reinspect the boards and compare their condition with the planned parts. Confirm that the material still provides the required dimensions after any preparation needed. A layout made at the timber yard may need revision if a defect or distortion becomes clearer later.
Check moisture appropriately where it matters, review the intended environment and make the next operation deliberate. Do not assume that time in the workshop has automatically solved every condition issue. Nor should a small visual change prompt an unsupported conclusion that all the stock is unusable.
Good storage preserves options. It keeps the material protected and the information attached so the next decision is based on the board in front of you rather than a memory of what was purchased.
Source and scope
Chapter 13 of the USDA Wood Handbook covers drying, moisture control and dimensional changes. This article offers workshop organization questions, not an engineered rack design or a prescribed drying schedule. For the selection stage, return to choosing pine boards.
Keep the notebook open.
Leave room for wood movement
Grain direction, moisture and restraint belong in the design before a wide panel is fixed in place.
29 Aug 2025 · Elise Tran
How to choose pine boards for furniture
Read grain, knots, distortion and moisture before deciding which boards can become useful furniture parts.
13 Feb 2024 · Elise Tran